1. PM Basics
- 4.1 Overview Info
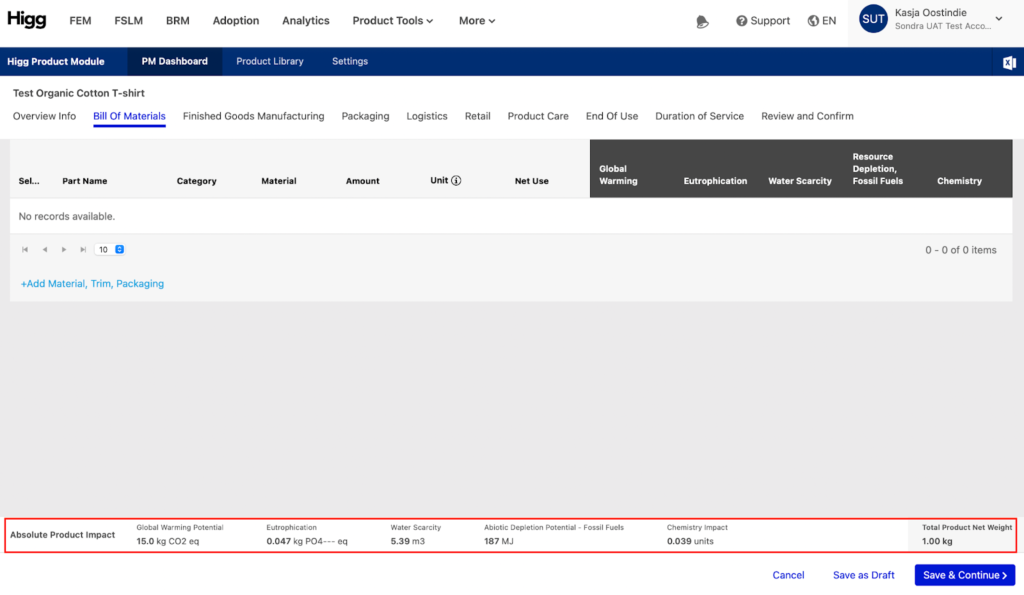
- 4.2 Bill of Materials
- 4.3 Finished Goods Manufacturing
- 4.4 Packaging
- 4.5 Logistics
- 4.6 Retail
- 4.7 Product Care
- 4.8 End of Use
- 4.9 Duration of Service
- 4.10 Reviewing and Finalizing Your Product
5. Understanding the Product Library and Scores
4.1 Overview Info
To create a product and adjust product information, click the “Create Product” button on the Higg Product Module dashboard.
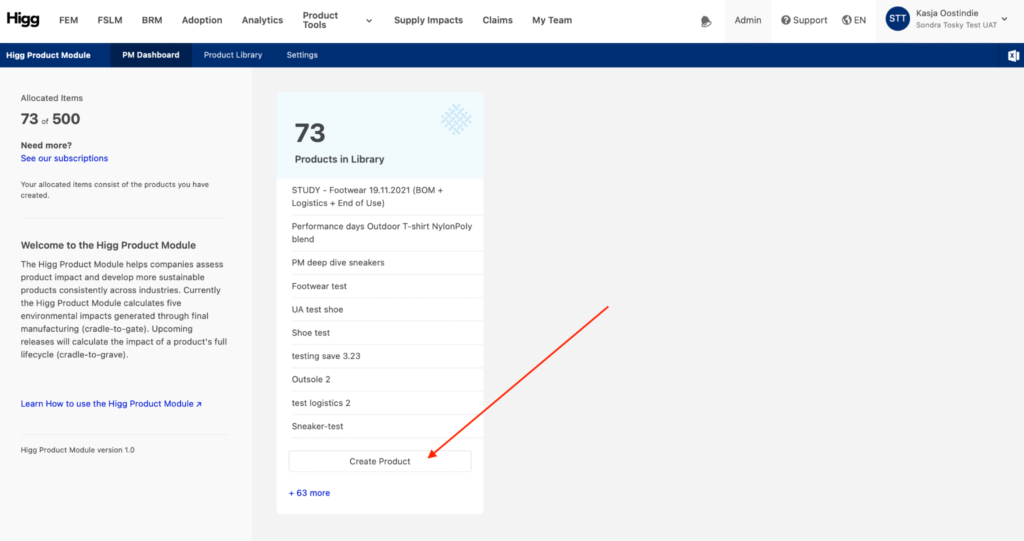
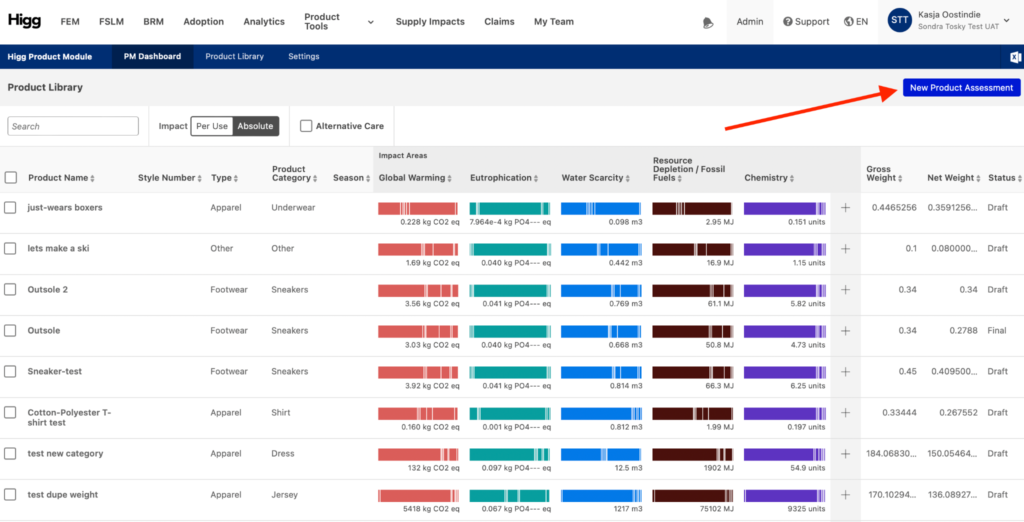
Another way of starting your product creation is to click “New Product Assessment” in the top right corner of your Product Library.
This will pull up the Overview Info page of the New Product Assessment section, which allows for the entry of basic product information.
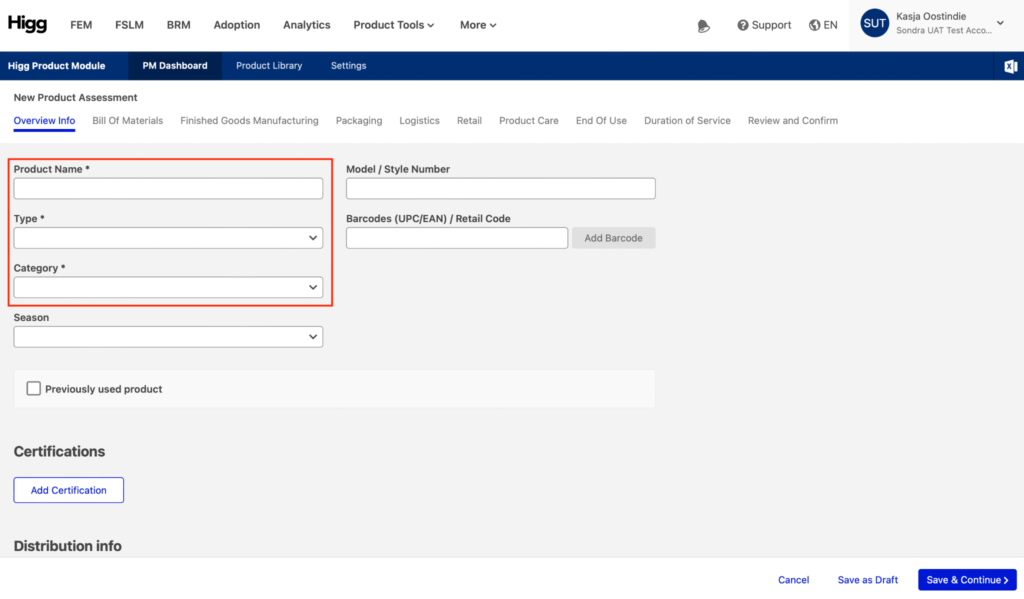
There are two types of information that can be entered on this page:
- Required information, indicated by the asterisks (*). The information in the fields in the red box in the above screenshot needs to be entered before moving to the next steps.
- Additional information, while it is possible to proceed to next steps without completing these fields, this information will be useful to better compare different products in the Product Library.
Required information/compulsory information
- Product Name
- Product Type, this will determine which processes are available in the Finished Goods Manufacturing section
- Product Category, this will be used for benchmarking products in the same category
Additional information
- Season (season-options can be edited in the “Settings” (see section 2)
- Model/Style Number, which is useful as an internal product reference, especially for those intending to use the Higg API to connect with your PLM.
- Barcodes can be added for internal reference. More than one bar-code can be entered. Barcodes can be entered in numerical and textual values.
- Previously Used Product
- Certifications
- Distribution Info (default numbers can be edited in the “Settings” (see section 2)
Previously Used Product
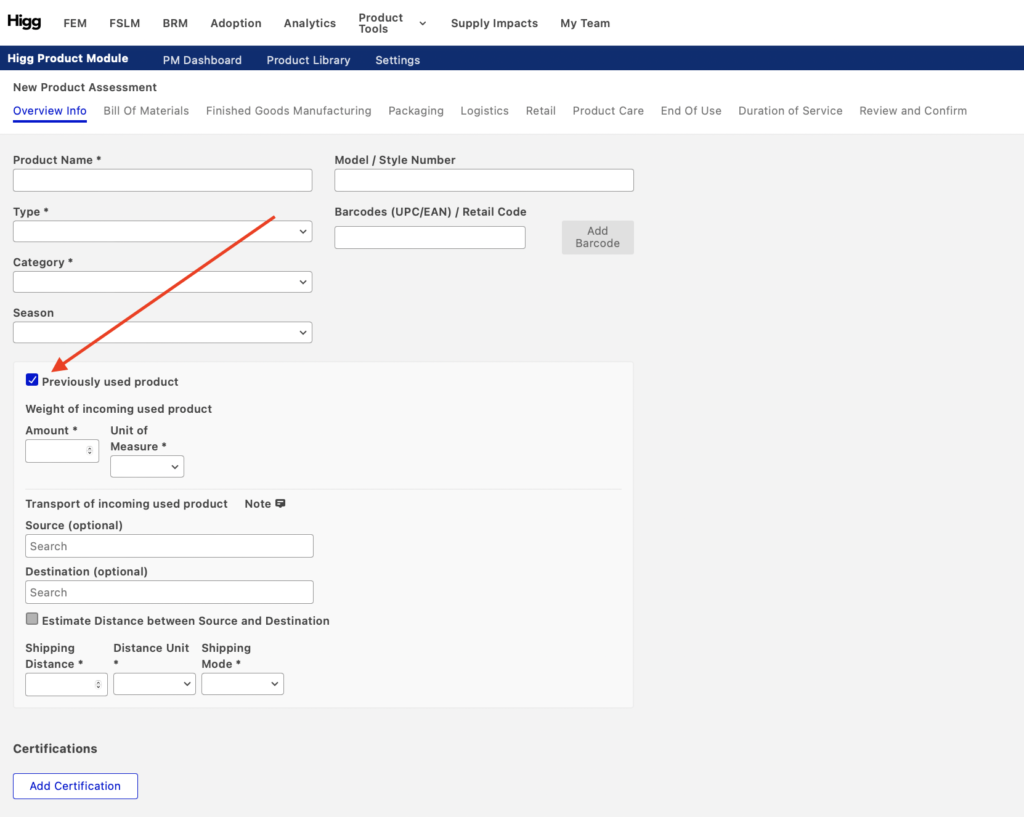
When beginning a New Product Assessment, it is possible to indicate whether the product has previously been owned or used, requiring conversion back into sellable condition. If this option is selected, the weight of the previously used product and the transport associated with its processing can be entered. Using a previously used product removes the need for new material processing and its associated environmental impacts. Hence no impact for new material processing is taken into account in the product assessment.
Please Note: Previously Used Product does not appear in further sections of the Higg PM and can only be customized here.
Tick the box “previously used product” and fill out the following information:
- Amount & Unit of Measure. It is not possible to use yield for previously used products.
- Source & Destination to calculate inbound transportation. Click “estimate” to pull this data from GoogleMaps.
In the next steps it is possible to add additional materials on the “Bill-of-Materials”-page and manufacturing processes on the “Finished Goods manufacturing”-page, but it is not required if you have selected the “previously used product”-option.
The weight entered in the “previously used product”-field is taken into account in the impact calculation of the following life-cycle phases.
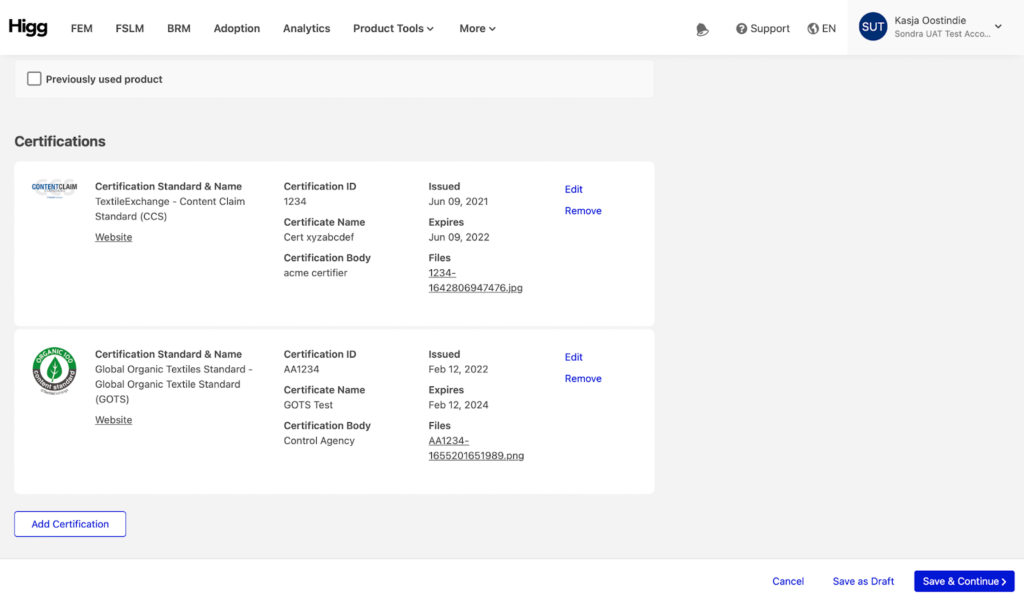
Adding Certifications
It is possible to add a certification to a product.
Adding a certification does not affect the calculated impact of your product. This is simply an attribute to the product.
There is no integration between Higg Product Module and certifying bodies or organizations, hence it is not possible to automatically pull up data from their systems and use it in the PM. Certifications always need to be added manually.
The certifications that can be added on a material level in the MSI are not in any way linked to the certifications that can be added in the PM.
Clicking “Add Certification” will open the “add certification”-window.
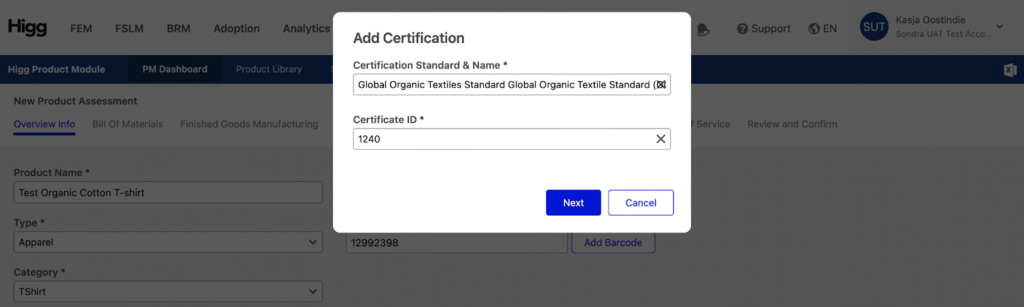
In this window it is possible to either pull up an existing certification or to create a new one. To pull up an existing certification, enter the name and the Certificate ID.
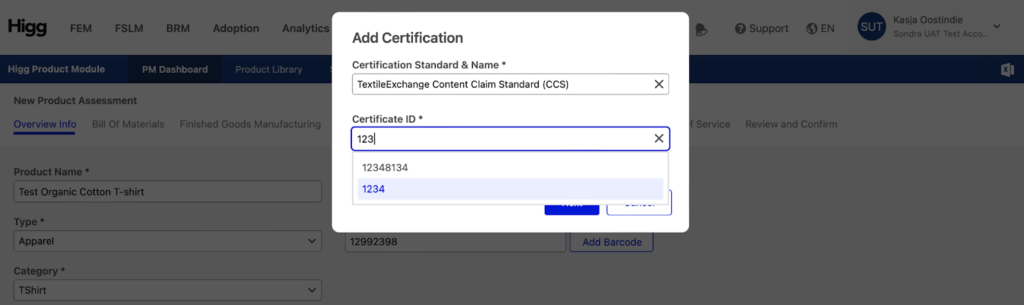
Select the right ID and then click next. This will pull up all the information entered of this certification.
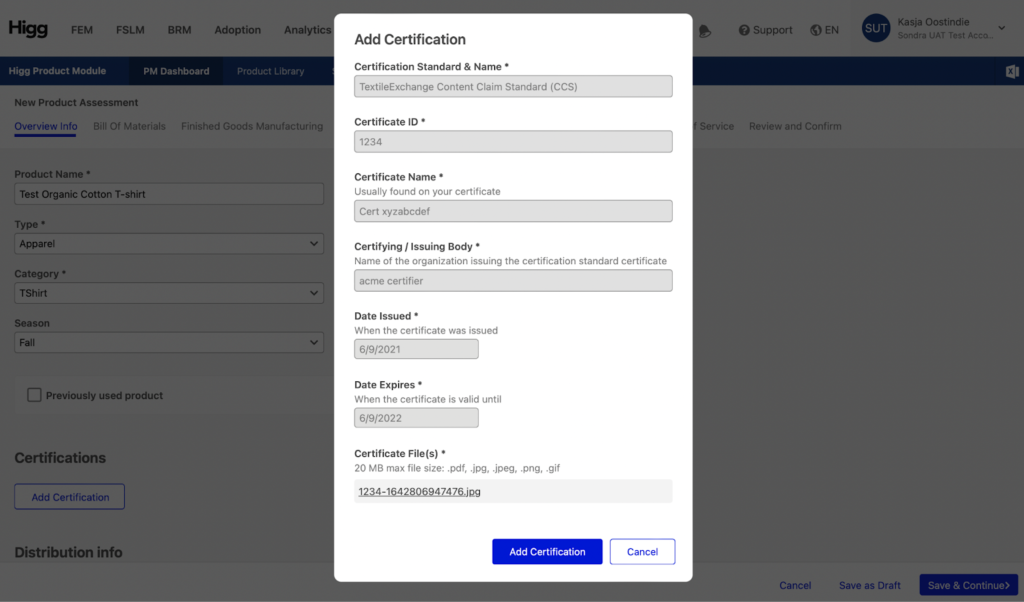
It is also possible to create a new certification. To do this, add the Certification and the Certificate ID and click “next”. This will unfold the additional fields to enter information about the certificate. All fields are required fields:
- Certificate Name
- Certifying/issuing Body. This is the organization that has assessed your company or product and has issued the certification to you.
- Date issued
- Date expires
- Certificate files. Upload a copy of the certificate as proof.
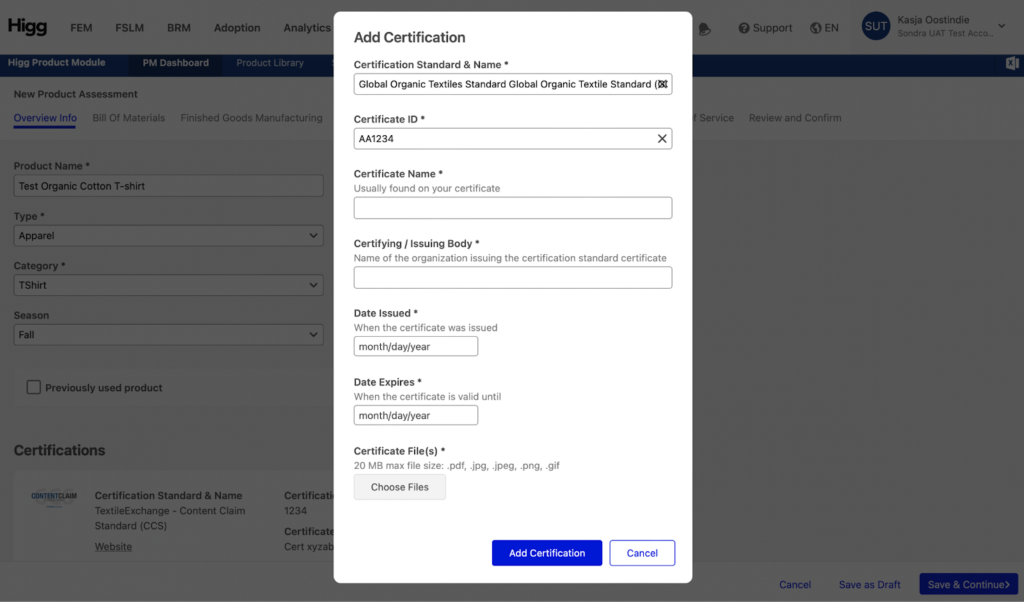
Click “Add Certification” to add the created certificate to the product.
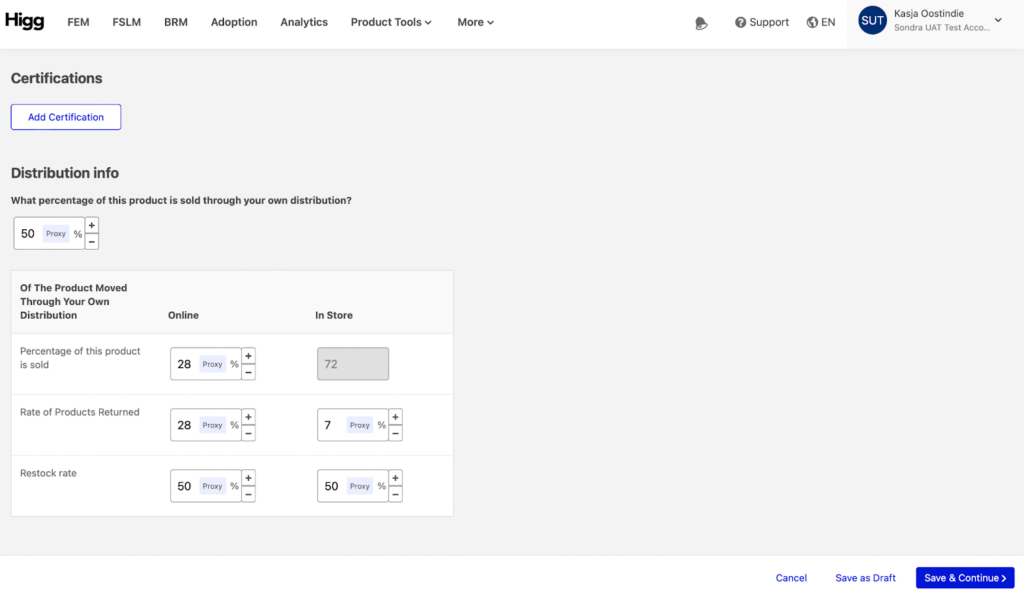
Distribution Info
The Distribution Info section enables users to customize information related to a company’s distribution channels.
Users can update the Distribution Info either here in the Overview Info section of a New Product Assessment or prior to starting a New Product Assessment, in the Settings tab. Updating Distribution Info in the Settings tab will automatically apply to all New Product Assessments and will not need to be customized in both places.
For information on how to complete Distribution Info, please see Distribution Info in the Managing Settings section, above.
Once all of the required information has been entered, the “Save & Continue” button will activate on the bottom right-hand corner of the screen. Clicking this button will pull up the “Bill Of Materials”-page, which is the next step of the New Product Assessment process.